Wow. I'm not sure if I'm more in love with the original recipe or the leftover creation. I have photos of neither. I've been on an anti-food photo kick for ages and until I find (ha!) the time to create an awesome food photo station in my kitchen chances are you will have to take my word for the fact that something looks as good as it sounds (or maybe better).
I was in a rush yesterday morning and knew I was leaving at 1130 and wouldn't be home until 6pm. Mike's "new" job is kind of nuts and he doesn't get home before 6pm so there was no chance he was going to be able to swoop in to serve dinner unless we ordered take out which we have done once this week already. A long winded way to say that I decided the slow cooker had to come to the rescue. The tricky part was that I only had 15 minutes to find a recipe and pull it together. Enter Google.
I searched for slow cooker chicken breasts with tomatoes knowing I had thawed chicken and an accidentally opened can of whole tomatoes sitting in my fridge. In swoops Dishing With Leslie's slow cooker Balsamic Chicken recipe.
I skimmed the recipe and a couple comments following and decided to try it out. Of course as I was dumping the ingredients in I realized I did not have balsamic vinegar on hand DUH so I improvised (yep Google to the rescue once again) and used a mix of red wine vinegar and sugar (1 tbsp red wine vinegar:1/2 tsp sugar). I was also out of garlic which I can confidently say would up the fabulousness of this recipe. Who runs out of garlic? I used a can of whole tomatoes which I hacked at with a knife before dumping them in, turned the cooker on low, woke up my sleeping baby and flew out of the house just in the nick of time while crossing my fingers and toes.
Fast forward to 550pm when I rushed back into the house with my hungry almost three year old and a tired baby. The house smelled FANTASTIC. For once the Rock Star didn't ask "Ew. What smell is this?!". Instead he asked, "Dinner ready, Mommy?" Thank you whoever invented the slow cooker.
I tossed some egg noodles into boiling water, Mike arrived home and less than 10 minutes later we sat down for dinner. I figured my boys wouldn't appreciate the sauce and chicken on noodles but they love butter on egg noodles and they both need some fat on their bones so butter it was for them with the chicken on the side. I on the other hand dumped ladles of tomato goodness over the chicken which sat on my noodles. Delish. Surprisingly super yummy. It smelled great and tasted even better. I love a meal that makes everyone happy without being boring for the one person in the house who doesn't mind their food "mixed up".
After gorging myself on a super easy and yummy dinner I was packing up the leftover chicken when something told me to dip into the pot and gulp down some sauce. Oh. My. God. I dumped the liquidy goodness into a jar deciding soup would be on the menu for Mama tomorrow. That's when I popped back over to Leslie's blog and checked out the Balsamic Chicken files where I found a recipe for soup using the leftovers. Great minds think alike so Leslie must be pretty freaking awesome.
Today I made the soup. How was it? Well.... I ended up having soup as my second lunch (yay for breastfeeding) and dinner. Mmmmmmm.
Thanks, Leslie for posting this outstanding recipe. It is definitely a keeper and I have no doubt I will be making it over and over again!
Rather than posting the how to over here I feel like I should link to Leslie's original post. Show her some love by visiting her blog and trying out here delicious dishes. I know I will be back.
May 10, 2013
April 29, 2013
Better than Starbucks Banana Bread
My kid is a sucker for Starbucks insanely priced banana bread. I think it is decent but a little too dense for my liking and with recent dietary changes (more on that later) we have had to avoid it due to the buttermilk.

I have attempted to bake banana bread 5 or 6 times and each loaf has disappointed me in one way or another. A Google search led me to the recipe I am going to share with you today and after making it at least ten times it has yet to disappoint. It has the yum of Starbucks but is less dense and more moist. Today I altered the recipe by using organic coconut oil in order to up the healthy fat count in the skinny Rock Star's diet and it added even more to the WOW factor.

Thanks to The Cordial Churchman for sharing the recipe he found on a card at Starbucks. Here is the run down with the substitutions I've made. Enjoy!
What You Need
2 cups flour
1 teaspoon baking soda
1/4 teaspoon salt
1 egg
1 1/8 cups sugar
1/2 cup coconut oil (originally vegetable oil)
2 tablespoons almond milk (originally buttermilk)
1/2 teaspoon vanilla extract
3 ripe medium-large bananas, mashed
Optional: 1/2 cup chopped walnuts & 1/3 cup chopped walnuts (in addition to 1/2 cup)
What You Do
1. Preheat oven to 325. Grease a 9x5x3 loaf pan and dust with flour.
2. Blend the flour, baking soda, and salt; set aside.
3. Mix the egg, sugar, and coconut oil until combined. I warm the coconut oil to liquefy it first.
4. Add the flour mixture to the egg mixture and when blended, add the almond milk, vanilla, and mashed bananas; mix well.
5. Fold optional 1/2 cup of chopped walnuts.
6. Pour batter into prepared loaf pan.
7. Top the batter with remaining 1/3 cup of walnuts if using.
8. Bake for 45-60 minutes until a toothpick comes out clean.
Slather with butter substitute or not! We usually eat this bread plain because it is THAT good. Let me know what you think if you try it!
April 14, 2013
4 Months Already?!
Four months? What the?! I thought time flew when the Rock Star was a baby but it is moving even faster now. I'm trying to enjoy every moment and not wish babyhood away but I catch myself hoping for the days of sleeping at night and longer naps which is in turn wishing time away. I'm now consciously slowing down and enjoying more snuggles and 'typical' moments so that hopefully I don't look back with regret,

A note to my littlest love: we are head over heels for you! Your smiles come with less effort now which makes us so happy. We worry less about how you are feeling now that we see so many smiles. Your mood seems to brighten more and more each day, it is as if you are becoming more comfortable with the world. You have discovered the joy of eating your fingers and any others that venture near your mouth, you love the Jumparoo and are already figuring out how to bounce in it. You still hate tummy time but you do have a rather large melon so that might have something to do with it.
People comment all the time on how strong you are. You have been standing with support since a month old but now we can give you just a little help with one hand and you stand up on your own for fairly long periods of time. You love being sung to! You have just started to "play" with toys that you can grab and chew on. Books are becoming more interesting to you, your favourites are those with pictures of babies or animals.
You adore your daddy. He almost always earns ear to ear grins by just looking in your direction. Your big brother is your favourite thing to watch but his big growls and loud yells sometimes scare you. He sometimes feels bad when he startles you but I think that at other times he's pretty proud of himself for being such a convincing lion. When you cry or fuss the first person at your side is usually your Bro.
Finally the weather is starting to warm up and thank goodness it is because you love being outside! You sat in the swing out back for the first time last week and you were all smiles. Finally you can be outside and not have to be under a plastic cover to shield you from the wind.

You adore your grandparents and win them over by giving them all loads of smiles and coos. When we are out and about you tend to be rather serious around strangers, you make them work for your adorable crooked dimpled smiles.
I knew in my heart that I would love you to pieces but my brain worried that it would be difficult to love someone as much as I love your Big Bro yet here I am equally in love with the two of you. I had no idea a heart could hold so much love.
Thank you for choosing us to be your family, Baby Boy! Our world is a better place thanks to your existence. We adore you and cannot wait to see what you get into this month!
December 20, 2012
Welcome Home Chunky Monkey!

A long overdue virtual welcome to the newest sweet addition to our family! Our big little man was born on the magical date of 12-12-12 6:58 p.m. He is absolutely perfect and captured our hearts the moment he arrived.
I'll refer to our new little man as our little Punk Rocker and will likely slip and call him Chunk every now and then because he certainly is a chunky little monkey. Our birth story is similar to the Rockstar's. My OB predicted an early birthday and a 2 hour labour... unfortunately she was wrong on both accounts, but I'm over it now.
I went for an ultrasound on the 11th and my amniotic fluid levels were low. Chunk didn't flip over the expected three times so he officially failed the test. The ultrasound technician deemed me the 'calmest mother ever' because I didn't flip out over the FAIL label. I assured her I did care but that the exact same thing happened with my first so I wasn't worried. I visited my OB and our Punk Rocker's heart rate dropped during the Doppler monitoring so she scheduled my induction for the next day and sent me to the hospital immediately for further monitoring/testing. All was well and I was told to call the hospital early on the twelfth to find out when to return for the drip.
The morning of the 12th I had a little spotting so called triage and they told me to come on down to be examined by a doctor, the nurse said I was second in line so chances were they would just tell me to stay and would get things rolling. Sure enough that's exactly what happened. Our nurse Sophie was outstanding and we lucked out like we did the first time: she was with us for the entire labour.
At 1030 I was set up with an IV for the induction drip and also for the penicillin drip to deal with the fact that I was strep positive. Sophie nailed the vein on the first attempt which was a lovely way to start our day. I think I jinxed myself in a previous post by suggesting the IV was the worst pain I dealt with when delivering the RockStar.
At 1230 pm my water was broken after many many MANY attempts to break it. Our poor little Punk arrived with 12 scratches on the crown of his head thanks to the super thick sack he had been living in. My contractions kicked in around 1 pm. Although I was experiencing some lower back pain I thought I had things under control. Around 3 pm I was asked whether I had made a decision on the epidural, the anaesthesiologist was going into a surgery so he would not be available for an hour at the very least. I was 7 cm dilated and figured I had an hour to go (not sure why I was so sure this was the case but this was one time I shouldn't have trusted my instincts). After discussing things with my nurse who assured me that I was dealing well with the 2 minute long contractions at this point I decided to go without the epidural. S.T.U.P.I.D.
Hip hip horray for all of you who go without the drugs, I think it's funny how women get all bent out of shape around the "natural labour" talk. Having a baby is the most natural thing a woman can do: drugs or no drugs. I chose to go without the epidural initially (initially being the key word) because I was concerned it would slow things down, because I figured my labour was almost over and because I wanted to feel the birthing process more than I did with the Rock Star. Half an hour later I was seriously regretting my decision. I had full blown back labour thanks to my sunnyside up Punk and it was pain like I have never ever experienced. I have a relatively high pain threshold but wow.
The nurses were wonderful and various people came in to try and help me through the excruciating pain. At 5:30 pm I felt like I had to push and when I was checked I was still only 7 cm dilated. "1 cm to 2 cm an hour" came back to me and I broke down thinking I might have to deal with this for another three hours. I asked for the epidural reluctantly because I was terrified that if I was told I couldn't have it yet I would have a total meltdown. A call was made and lucky me: the anaesthesiologist was available!! 10 minutes later I had the painless epidural and by 6pm I was fully dilated!! My nurses said it was likely the epidural that helped me to relax enough to open things up. I was given a pump to up the epi if need be. I pushed it twice and then left it alone. The OB on call came in and told me to start pushing whenever I was ready.
Once I started pushing it was only 15 minutes before our little man made his grand entrance! His birth was exactly what I hoped for this time around: I was able to feel enough to know I was really happy to have requested the epidural, I wasn't dealing with nausea so I saw him slide into the world and this round I was able to watch his daddy cut the umbilical cord. We had immediate skin to skin time together which made me so happy!! Snuggles with my soft warm little man now on the outside was the most amazing experience ever.
Our Punk Rocker came into the world with a strong cry and a full head of hair! The Rock Star was born with a little triangular "tail" but our Punk is part werewolf also, he was born with furry little ears! So cute.
He is a gorgeous baby and was cute even all puffed up. He weighed in at a healthy 8 lbs 5 oz and was 21 inches long. He was born at 6:58 pm and nursed shortly after his arrival with no trouble!
He is a gorgeous baby and was cute even all puffed up. He weighed in at a healthy 8 lbs 5 oz and was 21 inches long. He was born at 6:58 pm and nursed shortly after his arrival with no trouble!
Believe it or not we do not have photos of Mike and I with the Punk right after his birth!! We were so happy to have him in our arms that we did not think of photos. I'm okay with this now, initially I was upset but I'm happy we lived in the moment and didn't worry about a camera.


Mike was an incredible support during and after the labour as expected. He is such an outstanding Daddy, the boys and I are really lucky!
Mr Maggo aka the Rock Star was the first person to meet our little Punk. I had really debated whether or not to have him come up to the hosptial, I didn't want him to be upset about us staying and him leaving but he handled things like a superstar which really is not surprising. My parents were the lucky two who shared the news with Big Bro. They wished they had recorded it because apparently he was glowing and so very happy that his brother had finally arrived.
Mike brought the Rock Star in and we had a few minutes to ourselves so that the boys could officially meet. My heart nearly exploded when Mike set the Rock Star on my lap: two little boys that we created! I was worried Big Bro would be jealous and there was not a smidge of jealousy, he was just thrilled to meet his little 'bruddah'. He admired his "yittle fingahs, yittle toes and yittle cheeks" and gave him gentle hugs. "He is so tiny and so cute! Awwww!"

Grams, Papa, Granny, Grandad and Auntie Joanne were all at the hospital waiting to meet our newest addition. Lots of hugs and smooches were handed out and of course tears of joy were shed. Uncle John and Uncle Paul came up the following day to meet their new nephew.
We were happy to be able to go home on the evening of the 13th. The nurses were phenomenal and arranged to have blood work done at exactly the 24 hour mark so that we would be able to escape if all was well and thankfully it was! We took our little Punk home and had a night to ourselves. The Rock Star returned home the following day when we picked him up after the Punk's hospital check-in where we found out he had gained even more weight. Oink oink.
Life with two little men is a whole new ball game but thanks to a sweet Rock Star and an adorable sleepy Punk it is off to a great start! Welcome to the world Baby Boy!! Mommy and Daddy love you more than you can possibly imagine!

Mike brought the Rock Star in and we had a few minutes to ourselves so that the boys could officially meet. My heart nearly exploded when Mike set the Rock Star on my lap: two little boys that we created! I was worried Big Bro would be jealous and there was not a smidge of jealousy, he was just thrilled to meet his little 'bruddah'. He admired his "yittle fingahs, yittle toes and yittle cheeks" and gave him gentle hugs. "He is so tiny and so cute! Awwww!"

We were happy to be able to go home on the evening of the 13th. The nurses were phenomenal and arranged to have blood work done at exactly the 24 hour mark so that we would be able to escape if all was well and thankfully it was! We took our little Punk home and had a night to ourselves. The Rock Star returned home the following day when we picked him up after the Punk's hospital check-in where we found out he had gained even more weight. Oink oink.
Life with two little men is a whole new ball game but thanks to a sweet Rock Star and an adorable sleepy Punk it is off to a great start! Welcome to the world Baby Boy!! Mommy and Daddy love you more than you can possibly imagine!

December 8, 2012
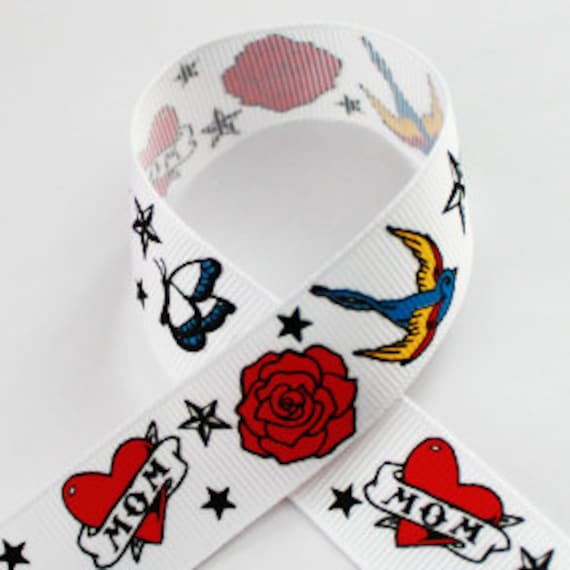
Tattoo Love/Hate Relationship
I love tattoos. Unfortunately I have one that I hate. When I was in grade eleven I went with a good friend to a tattoo shop on our lunch hour and we chose a cheesy hand drawn sun off the wall (it looked like a 4 year old had drawn it with all squiggly lines and a happy face on it). Yep, it took me 15 minutes to decide what I was going to have placed permanently on my lower back: brilliant.
About ten years ago I had my sun covered up by someone at a great shop who had a good portfolio. I took a lot of time to decide on my final piece. I chose to have my parents favourite flowers and the word family cover the sun. You should be able to look at my back and spot a hollyhock and a violet... a friend asked me last week if I had the anatomy of a heart on my back and she was serious *sigh*
In retrospect I think I should have asked to see more shots of her cover up work rather than relying on the artists original designs. My sun had loads of black lines so yes she had a tougher piece to work with BUT seriously, the anatomy of a heart?!
Tattly is an awesome online shop that sells totally affordable temporary tattoos for grown ups and kids too!! Why didn't Tattly exist in 1996?! Here are a few of my favourites from the shop... pop over and check out the other designs.


 |
| be happy |
I know I'm not the only one who has a tattoo they regret, do you have one you love or hate?
December 6, 2012
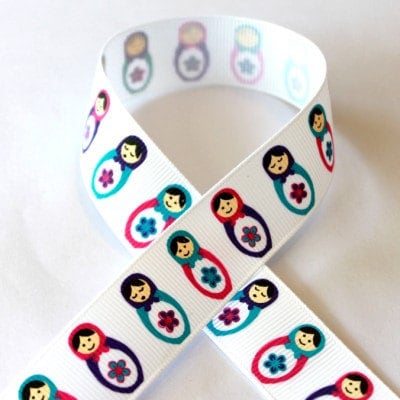
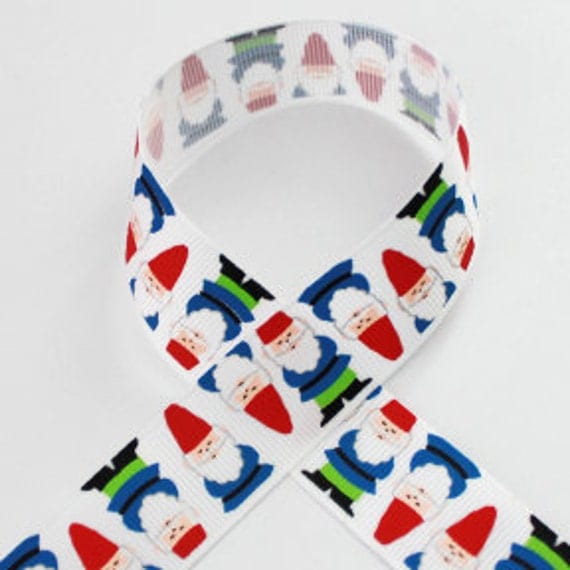
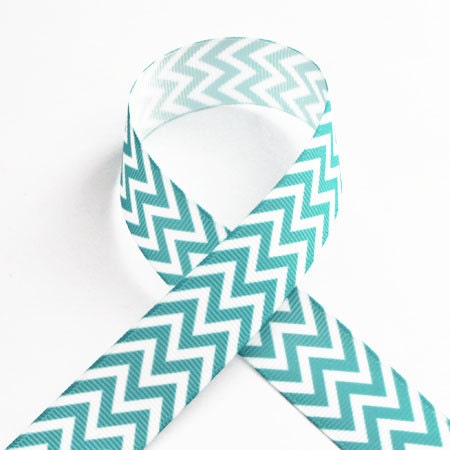
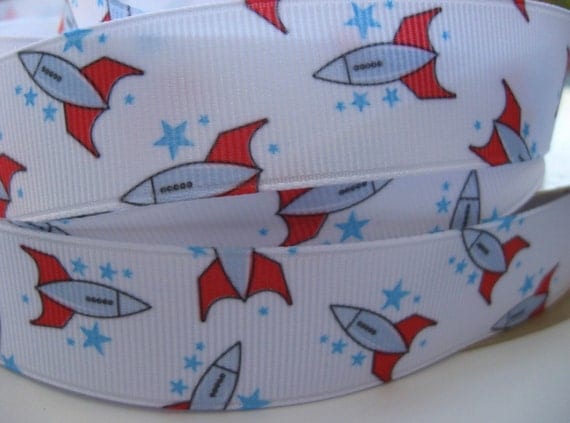
Ribbon Love
I promise I will start to post like I did in the old days: not just Rockstar and Bounce updates but crafty bits, kudos to other fabulous blogs, recipes and fabulous finds. I promise! I'm really going to try to post at least a couple times a week but I'm saying this while waiting for the newest member of our family to pop so we'll have to wait and see what this little nut is like before I make any number promises
I lurve ribbon . Here are some sweet finds from Etsy and of course some boy inspired designs because I live in Boyville.


December 5, 2012
D-Day Has Arrived

Big Brother cuddles Bounce at 39 weeks preggers
Will Bounce be one of the 5% to arrive on his due date?! Today is the official due date but so far nothing. I'm crossing my fingers he comes soon, I'm itching to meet him and so are Daddy and big bro the Rockstar. This morning our Rockstar asked when his "brudah" is "comin' out" and I assured him it wouldn't be too long from now but a week feels like a lifetime when you're two.
There was some visible movement forward yesterday so here's hoping the next sign will be real contractions. I have an ultrasound booked for next Monday the 10th followed by an OB appointment so if Bounce has not made an appearance by then I suspect I may end up being induced. Cross your fingers for a D-day delivery! Come on Baby Bounce we want to hold you in our arms and smell your sweet new baby scent!
Subscribe to:
Posts (Atom)